TRENDING NOW

UTS Sites Is A Professional Web Design, Web Development, Seo Services Company In India. That Provides Outsourced Services.
How To Add Custom Robots.txt File in Blogger

In one of my previous posts, I had discussed Custom Robots Header Tags Settings for blogger.
If you have read that post then I hope you guys are aware of its importance in search rankings.
Today, I am back with a very useful and must aware blogging term that is Robots.txt.
In blogger it is known as Custom Robots.txt that means now you can customize this file according to your choice.
In today's tutorial, we will discuss this term in deep and come to know about its use and benefits. I will also tell you how to add custom robots.txt file in blogger.
So let's start the guide. 
More...

What is Robots.txt?

Robots.txt is a text file which contains few lines of simple code.
It is saved on the website or blog's server which instruct the web crawlers on how to index and crawl your blog in the search results.
That means you can restrict any web page on your blog from web crawlers so that it can't get indexed in search engines like your blog labels page, your demo page or any other pages that are not as important to get indexed.
Always remember that search crawlers scan the robots.txt file before crawling any web page.
Each blog hosted on blogger has its default robots.txt file which is something look like this: 
User-agent: Mediapartners-Google
Disallow:
User-agent: *
Disallow: /search
Allow: /
Sitemap: http://example.blogspot.com/feeds/posts/default?orderby=UPDATED

Explanation 

This code is divided into three sections. Let's first study each of them after that we will learn how to add custom robots.txt file in blogspot blogs.

User-agent: Mediapartners-Google 

This code is for Google Adsense robots which help them to serve better ads on your blog. Either you are using Google Adsense on your blog or not simply leave it as it is.

User-agent: * 

This is for all robots marked with asterisk (*). In default settings our blog's labels links are restricted to indexed by search crawlers that means the web crawlers will not index our labels page links because of below code.

Disallow: /search 

That means the links having keyword search just after the domain name will be ignored. See below example which is a link of label page named SEO.
http://www.bloggertipstricks.com/search/label/SEO
And if we remove Disallow: /search from the above code then crawlers will access our entire blog to index and crawl all of its content and web pages.
Here Allow: / refers to the Homepage that means web crawlers can crawl and index our blog's homepage.

Disallow Particular Post

Now suppose if we want to exclude a particular post from indexing then we can add below lines in the code.
Disallow: /yyyy/mm/post-url.html
Here yyyy and mm refers to the publishing year and month of the post respectively. For example if we have published a post in year 2013 in month of March then we have to use below format.
Disallow: /2013/03/post-url.html
To make this task easy, you can simply copy the post URL and remove the blog name from the beginning.

Disallow Particular Page

If we need to disallow a particular page then we can use the same method as above. Simply copy the page URL and remove blog address from it which will something look like this:
Disallow: /p/page-url.html

Sitemap: http://example.blogspot.com/feeds/posts/default?orderby=UPDATED 

This code refers to the sitemap of our blog. By adding sitemap link here we are simply optimizing our blog's crawling rate.
Means whenever the web crawlers scan our robots.txt file they will find a path to our sitemap where all the links of our published posts present.
Web crawlers will find it easy to crawl all of our posts.
Hence, there are better chances that web crawlers crawl all of our blog posts without ignoring a single one.
Note: This sitemap will only tell the web crawlers about the recent 25 posts. If you want to increase the number of link in your sitemap then replace default sitemap with below one. It will work for first 500 recent posts.
Sitemap: http://example.blogspot.com/atom.xml?redirect=false&start-index=1&max-results=500
If you have more than 500 published posts in your blog then you can use two sitemaps like below:
Sitemap: http://example.blogspot.com/atom.xml?redirect=false&start-index=1&max-results=500

Sitemap: http://example.blogspot.com/atom.xml?redirect=false&start-index=500&max-results=1000

Adding Custom Robots.Txt to Blogger 

Now the main part of this tutorial is how to add custom robots.txt in blogger. So below are steps to add it.
  1. Go to your blogger blog.
  2. Navigate to Settings >> Search Preferences ›› Crawlers and indexing ›› Custom robots.txt ›› Edit ›› Yes
  3. Now paste your robots.txt file code in the box.
  4. Click on Save Changes button.
  5. You are done! 
blogger custom robots txt


How to Check Your Robots.txt File? 

You can check this file on your blog by adding /robots.txt at the end of your blog URL in the web browser. For example: 
http://www.yourblogurl.blogspot.com/robots.txt
Once you visit the robots.txt file URL you will see the entire code which you are using in your custom robots.txt file.
See below image.
robots txt

Final Words! 

This was the today's complete tutorial on how to add custom robots.txt file in blogger.
I tried my best to make this tutorial as simple and informative as possible. But still if you have any doubt or query then feel free to ask me in the comment section below.
Make sure not to put any code in your custom robots.txt settings without knowing about it. Simply ask me to resolve your queries. I'll tell you everything in detail.
Thanks guys for reading this tutorial. If you liked it then please support me to spread my words by sharing this post on your social media profiles. Happy Blogging!
UTS Sites Is A Professional Web Design, Web Development, Seo Services Company In India. That Provides Outsourced Services.
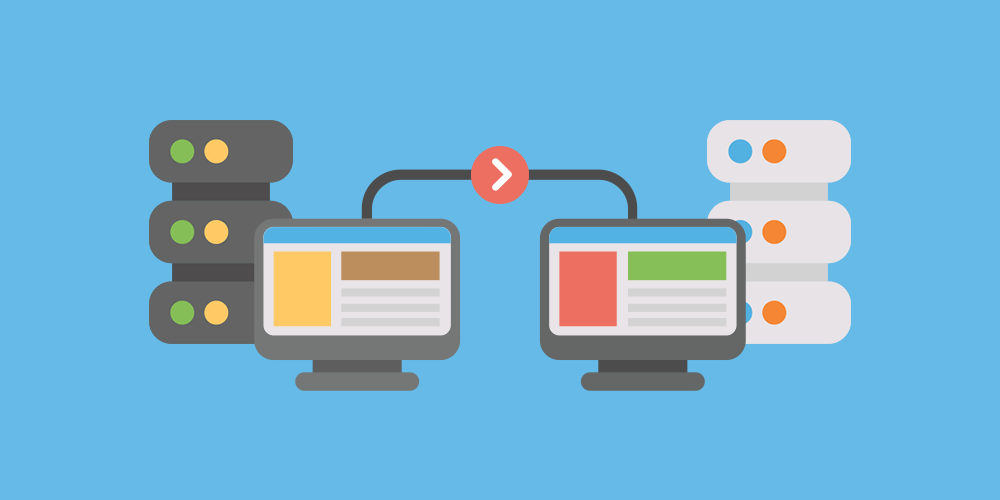
How to Transfer WordPress | Learn How To Make A WordPress Migration To A New Host

In this tutorial we will show you how to make a WordPress transfer to a new hosting platform. Whether you're transferring from WordPress.com or from another regular hosting provider, here you will find detailed instructions on how to migrate WordPress to a new host.

Follow these steps to make a WordPress transfer from one host to another:

Make a full WordPress Transfer
Transfer WordPress from wordpress.com
Migrate your WordPress data only

Make a full WordPress Transfer


A WordPress migration from one hosting provider to another is an easy task if performed properly.

Basically, to make a WordPress migration from one host to another consists of three parts - moving the files, moving the database and reconfiguration (if needed).

Transfer WordPress Files

To move your files from one host to another you can use your favourite FTP client. For more information on how to use FTP, please check FTP Tutorial (Search On Google). It will teach you how to move the files of your application first to your local computer and then to upload them on the new account. If your old host is using cPanel, you can use the File Manager tool to create a .ZIP archive of all your site files. You can then transfer it to your new host and extract it. This will save you time because transferring one big file is much faster than transferring thousands of small ones.

Migrate the WordPress Database

The second step is to move your database. First you need to export your database from the old hosting account. If it uses cPanel you can safely follow these instructions (Search On Google : MySQL Backup/Restore Tutorial). If not, contact the support team of your previous hosting company in order to receive more information on how to export your database. After you have your data exported, create a new database on your new hosting account and import your content in it.

Reconfigure WordPress to work from the new server
Now, you have your files and database transferred. All you have to do is to reconfigure your WordPress application to work from the new place.
To do this, open the wp-config.php file in your WordPress root folder and locate the following lines:
You need to replace those values with your actual database, database username and password for it.
Now save this file and your WordPress site should be up and running from your new hosting account!
IMPORTANT!Note that if you change the domain name of your site additional reconfiguration is required.
INFORMATION!For more information on that matter check our tutorial on how to change a WordPress site URL
Transfer WordPress from wordpress.com
It is now possible to transfer your blog from WordPress.com to a stand-alone WordPress installation on your hosting account with just few clicks. To move your site, first login to your WordPress blog.Then go to the Tools menu and select Export. On the page that loads chose to export All content and click on the Download Export File button. Then download the .xml file on your computer.

This is all you need to do on your WordPress.com account. Now you need to import your information to your stand-alone WordPress installation. If you have one installed, login with your admin username and password. If you want to install a fresh WordPress application, check out our WordPress installation tutorial for more information on how to do this.Once you login, select the Tools menu from the left column and chose Import.

This page will show you the available sources you can import content from. Scroll down and select WordPress as an import type.

A popup will open asking you to install the WordPress Importer plugin. Click on the orange Install Now link to proceed.

Once the plugin files are downloaded, select the Activate Plugin & Run Importer link.

You will be redirected to the actual plugin page. Now click the Browse button, select the .xml file you have previously saved on your computer and click on the Upload file and import button.If the content which you want to migrate is quite large the corresponding web server's timeout value can be reached before the data is fully copied. In this case you need to reupload the .xml file. The system keeps a record for the migrated content and will proceed with the remaining data. Repeat the procedure until you receive a confirmation that the process is successfully completed.

Since you will be inserting new posts and pages WordPress needs to know who will be their author. On this page you can either select an existing user as posts author, or you can create a new one for the imported data. Note that you should check the Download and Import file attachments checkbox if you want your photos and other attachment to be transferred too. Finally, click on the Submit button.

That's it! Your data is now transferred from your WordPress.com account to your stand-alone WordPress application.

IMPORTANT!This will transfer only your content - posts, pages, media. All the plugins and themes you've used at WordPress.com are proprietary and not part of the transfer. You will have to choose a new theme and install all the necessary plugins you need additionally on your self-hosted WordPress site.
Migrate your WordPress data only
Sometimes you may want to transfer only the content from your WordPress site from one application to another (between two different WordPress installations). In such cases, WordPress provides you with an easy mechanism to move your posts, comments, users, attachments and other information with just few clicks. To do this, first login as administrator in your existing blog backend and select Tools -> Export from the left menu.

On this page chose whether you want your Posts, Pages and other available content transferred or you want all the content to be exported. For the purpose of this tutorial, we've chosen to move all the content. Then press the "Download Export File" button and save the .xml file to your computer.Now, login to your new WordPress installation and chose Tools -> Import from the left menu. On this page select "WordPress" in order to import content from your previous WordPress installation.

On the next page you have to select whether you want the new content to be posted with an existing author or under a new username. Make sure you check the "Download and import file attachments" checkbox. This will allow WordPress to move correctly your posts including all the photos and other media you've inserted into them.


Finally, press the Submit button and your content will be imported into your new WordPress application. That's it! Your posts and media are now successfully migrated!
UTS Sites Is A Professional Web Design, Web Development, Seo Services Company In India. That Provides Outsourced Services.

  • 100% Responsive Design
  • Very Advance Search Engine Optimization (SEO)
  • Auto Resize Thumbnail Image
  • Threaded Comment
  • Author Supported
  • Auto Blog Post Summarize
  • Popular Posts
  • 3 Column Footer Area
  • Business Look
  • Compatible With Major Browsers (Internet Explorer, Mozilla, Chrome, Safari)
  • Newsletter Subscription
  • CSS3 + HTML Dropdown Menu
  • Fixed Top Navigation That Collapses On Scroll
  • Smooth Scrolling Animations 
  • Scrollspy That Highlights Active Page Sections
  • Scrolling Navigation
  • Load More Post
  • Custom Error 404 Page
  • Contact Form
  • Fast Loading
  • Social Media Icons
  • Tabbed Sidebar Area
  • Lifetime Support
  • And More

Site Details:

Site Ready Status: 5 Days

Price INR + Tax: 2999 + 59.98

Site Code: 10092019

Category: Business, Responsive, Creative, Corporate 

Description: Bulid Website And Get FREE Lifetime Hosting And Search Engine Optimization (SEO). We Can Also Provide Ongoing Website Maintenance Service. We Will Manage The Domain Name Registration For 1 Year. Ready Laptop, Computer, Mobile, Tablet View.
Live Preview Order Now (USD $) Order Now (INR ₹)
UTS Sites Is A Professional Web Design, Web Development, Seo Services Company In India. That Provides Outsourced Services.
In this tutorial we will provide you with detailed instructions on how to install WordPress on your web hosting account. Follow these guidelines if you want to perform a new, manual installation of the latest WordPress version.

Follow these steps to install WordPress manually:


STEP 1
Download the WordPress installation package

To start the installation process, first you need to download WordPress from it's official download page. We recommend that you always download and install the latest stable version of WordPress.


Once you click on the Download button for the latest WordPress version, the installation package will be saved to your hard disk. Locate the installation package that you've just downloaded and extract it to a new folder.


STEP 2 Upload the WordPress Files to Your Server

Now, you need to upload the extracted files and folders to your web server. The easiest way to upload the installation files is via FTP. For detailed information on how to upload files via FTP, please check FTP Tutorial.
IMPORTANT!

If you want your WordPress to be the main installation on your account and to be accessible through your main domain (i.e. www.mydomain.com), you need to upload the extracted files to your public_html folder.
Once the download is complete, extract the archive and upload it to your web hosting account. You can do that via FTP using a client application like Filezilla or via cPanel -> File Manager -> Upload file(s). If you want this WordPress installation to be main for your website, the files should reside in the public_html folder of your account. However, you can always make a subfolder (i.e. public_html/blog) if you want to run only part of your website on WordPress.


STEP 3 Create a MySQL Database for WordPress to use

Now, you need to create a MySQL database and assign a user to it with full permissions. For detailed instructions on how to do that, please follow the steps described in tutorial on How to Create MySQL Username and Database. Once you create your MySQL Database and User, make sure you write down the database name, database username and password you've just created. You will need those for the installation process.


STEP 4 Go through the installation process

Now it's time to navigate to your website to start with the installation process. If you have uploaded WordPress in your public_html directory you'll need to go to http://yourdomain.com in your preferred browser. The first thing you will notice is a message, telling you that you don't have a wp-config.php file and you should create one. Just click on the Create a Configuration File button to proceed.


On this page you will see a message, asking you to prepare the necessary information for the installation. Since we already have this information, simply press the Go! button.


Enter the details for your newly created MySQL database and press the Submit button


WordPress will now check if your settings are correct. If you have entered all the necessary information, you will see a confirmation screen. Press the Run the Install button to proceed.


On the next screen you will have to enter the information about your administrative username and the title of your new site. In addition, you can specify whether you'd want search engines to index your site or not. Once you fill in that information, press the Install WordPress button. Bear in mind, however, that you should specify a real email address. It can be later used in case you forget your password.

THAT'S IT!

Your new WordPress application is installed. You can use the Login In button to access your administrative backend and start posting in your new site.
UTS Sites Is A Professional Web Design, Web Development, Seo Services Company In India. That Provides Outsourced Services.
Nowadays advertisement is essential part of most of the websites on the Internet. In this tutorial we will show you how to add banners to different parts of your WordPress site. Most of the websites that offer banners will provide you with the entire banner code so all you have to do is decide where you want to place the banner and follow the instructions below.


How to add banners to your sidebar

It is common practice to use your sidebar to add banners. There are two ways to do this - if your theme supports widgets in your sidebar, you can add a Text widget with your banner code in it, or you can add the code directly to the sidebar.php file of your theme.

If your theme supports widgets, go to Appearance -> Widgets. Then, drag a Text widget to the appropriate widget area. In our case that would be "Main Sidebar". For the purpose of this tutorial, we will place this widget right under the search field. Finally, paste the banner code in it, set a title for the widget (that's optional, leave it empty if you don't want to have a title above your banner) and hit the Save button.


This will place the banner you want into the sidebar of your WordPress site.


If your theme does not support widgets you'll need to add your banner code directly into the sidebar.php. You can edit this file from the Appearance -> Editor part of your WordPress admin page.


How to add banners into a single post or page

If you want to add a banner into the body of your post or page, simply open the Text mode of the WordPress editor and paste the banner code in it.


This will add the image between the two sample paragraphs of this post. You can use the WordPress WYSIWYG editor in order to reposition or align this banner in order to make it look with the rest of your post or page.


How to add banners above or below all posts or pages

To add banners above or below all your posts or pages, you need to add the banner code inside the single.php or page.php files of your WordPress themes. Both files have similar content but they handle different parts of your site - your posts (single.php) and your pages (page.php). You can edit those files by logging to your WordPress admin area and going to Appearance -> Editor.

If you want to add the banner above your posts and pages, locate the following code:
<?php while ( have_posts() ) : the_post(); ?>
Right after it add the code of your banner. This will add your banner above the all of your page and post titles. Of course, you can add CSS styling in order to make it look according to your needs.


How to add banners to your header or footer

Adding banners to your footer or header depends on the theme you're using. If it has widget area added to its footer or header, you can follow the instructions in the first part of this tutorial for adding banners to the sidebar.

On the other hand, if your theme does not have widget areas added to the footer/header areas, you need to add your banners manually. To do this login to your WordPress admin page and go to Appearance -> Editor. For the purpose of this tutorial, we will add a custom SiteGround banner to your header. Since we will add the banner to the header of the site, select header.php from the list of files available for edit. Note that the code inside this file will be different depending on your theme. You need very basic HTML skills in order to add this banner.


First, find the opening of the body tag. In the twenty-twelve default WordPress theme it looks like this:
<body <?php body_class(); ?>>
Right after this add the following code:
<div class="headerbanner"><a href="BANNERLINK" target="_blank"><img src="LINKTOIMAGE" width="200" height="50" /></a></div>
You need to replace BANNERLINK and LINKTOIMAGE with the URL where you want the banner to point to and the link to the banner image. Finally, replace the width and height parameters with the actual dimensions of the banner image.

This code will render your banner on top of your site. Note that depending on the theme you're using, you may need to move the code in order to place it wherever you want.


Note that we wrapped the banner into a div element. We did this because we want to style this banner further. To do this, select style.css from the right column and when the page refreshes, add the following lines:
.headerbanner { display:block; margin: 10px auto; width: 480px}
This will center the banner and add some top margin making it look much better. Of course, this is just an example - you can use the full power of CSS in order to style the banner the way you want it.


Adding a banner to the footer is basically the same with one small difference - you need to open the footer.php file instead of the header.php one. Then, all you need to do is paste the code where you want to display the banner.


Use plugins to show banners on your page

If you want to display more than one banner on a page, track the ads you show, and more advanced functionality, it is advisable to use one of the available WordPress plugins for banner management.
Since it depends on your particular site structure and needs, we suggest that you browse through the banner plugins in the WordPress Plugins Directory in order to find the extension that will best fit your needs. Once you do that, you can install it as any other WordPress plugin following the instructions in our tutorial on How to Install WordPress Plugins.
UTS Sites Is A Professional Web Design, Web Development, Seo Services Company In India. That Provides Outsourced Services.
The first thing you see when you access your WordPress admin panel is the Dashboard. It is a collection of gadgets that provide you information at a glance so you don't have to navigate through different pages to get it. For example, you can see the new comments, make a quick draft post, see the latest WordPress news and more.


To configure what information you want to see on your WordPress Dashboard, click on the Screen Options button in the top-right part of your screen. It will expand a panel that will allow you to check and uncheck the different information blocks you want to see/hide.


Once you have the gadgets you want to use displayed, you can rearrange them by simply drag-and-dropping them around your screen. Note that since WordPress version 3.8 your admin panel is responsive. This means that depending on the size of your display you will see different number of available columns for your widgets.


In addition, when you install different plugins, some of them may provide you additional Dashboard gadgets to use. For example, if you have a WooCommerce-based store you can display things like your recent orders, monthly sales graph and more on your dashboard. Those can be shown or hidden from the Screen Options panel too.

UTS Sites Is A Professional Web Design, Web Development, Seo Services Company In India. That Provides Outsourced Services.
Depending on the theme you're using for your WordPress site there are different set of changes you can make to your site from within your admin panel. In this tutorial we will show you how to do some of the changes to your site using the Customization page. For the purpose of this tutorial we will use the Twenty Fourteen theme.


How to Access the WordPress Customization Page

To start customizing your WordPress theme, first go to Appearance -> Themes page.


On this page, locate the active theme (Twenty Fourteen in our case) and click on the Customize button next to its title.


The next screen will take you to a page that you can use to modify your WordPress theme in real time. On the left you will see a list of the available options and on the right a live preview of your site and how those changes will affect it.


How to Modify your WordPress Title and Tagline

The theme customization page allows you to modify your site's title and tagline and see how it will look on your actual site immediately. To do this, expand the Site Title & Tagline group of settings and alter the text. As you type you will see the new text showing up in the preview on your right side. Once you're happy with the result, simply click on the big Save & Publish button.


Customize your WordPress Front Page

WordPress allows you to choose between two options for your front page - a static page or a list of the latest blog posts with part of their content. This is another setting that you can config from the theme customization page. Expand the Static Front Page tab and you'll see the available options.


By default WordPress will show your latest posts on the front page. However, you can change that option to A static page. This will open two more options for you - to select a page to be displayed on your front page and on which page your blog posts should be shown. For both options you'll be able to choose from the list of all the pages you've published. If the list is empty this means that you don't have a single Page created in your site.


Additional WordPress Theme Customizations

Depending on the theme you're using there might be additional options in that page. For example, the Twenty Fourteen theme allows you to modify its site title & background colors, add a background image and more. Once you're happy with the result, simply click on the Save & Publish button to save the changes.